นายณภัทร หอมสมบัตร 011
คณะวิศวกรรมศาสตร์ สาขาวิศวกรรมคอมพิวเตอร์
วิชา : 04-513-201 การโปรแกรมคอมพิวเตอร์ขั้นสูง
1.ความเป็นมา
ในยุคที่เทคโนโลยีและการประมวลผลข้อมูลก้าวหน้าอย่างรวดเร็ว พบว่าการใช้ระบบสแกนใบหน้าเพื่อเข้าระบบและควบคุมการเข้าถึงมีความสำคัญอย่างมากในการปรับปรุงความปลอดภัยและความสะดวกในหลายสถานการณ์ต่างๆ
การแผนและพัฒนาระบบเทคโนโลยีที่สามารถรวมกันเพื่อเพิ่มความสะดวกและความปลอดภัยในชีวิตประจำวันเป็นหนึ่งในทิศทางการพัฒนาเทคโนโลยีที่น่าสนใจที่สุดในปัจจุบัน แม้แต่โทรศัพท์มือถือก็สามารถเข้าถึงเทคโนโลยี Python เป็นภาษาคอมพิวเตอร์ที่มีประสิทธิภาพในการตรวจจับใบหน้าด้วยไลบรารี่ OpenCV และ face_recognition
ด้วยเหตุนี้ ระบบระบบสแกนใบหน้ามีความปลอดภัยและความสะดวกสบายในการใช้งาน
2.วัตถุประสงค์
- เพื่อสร้างระบบรักษาความปลอดภัยที่สะดวกสบายการใช้งาน
- เพื่อศึกษาการเขียนโปรแกรมภาษา c++ และ Python
- เพื่อทำให้ผู้ใช้ได้รับการแจ้งเตือนทันที
3.ขอบเขต
- มีการแจ้งเตือนด้วย Line notify
- มีการใช้ IP Camera ในการรับมูลภาพส่งไป Python
- มีการเชื่อมต่อระหว่าง Python และ ESP32
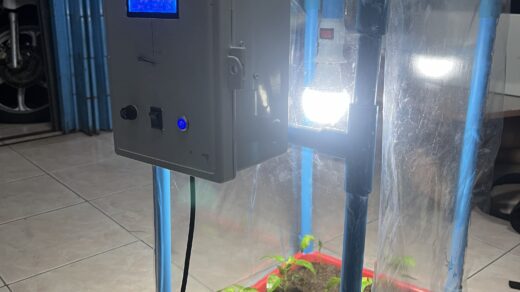
- มีการแสดงผลผ่านจอ LCD ,หลอดไฟ LED และServo Motor
4.ประโยชน์ที่คาดว่าจะได้รับ
- ทำให้เกิดความสะดวกในการใช้งานระบบหรือเข้าระบบต่างๆ
- ทำให้แจ้งเตือนทันทีแบบ Real Time
5.ความรู้ที่เกี่ยวข้อง
5.1 CV2
OpenCV (Open Source Computer Vision Library) เป็นชุดคลังรหัสซอฟต์แวร์โอเพนซอร์สที่พัฒนาขึ้นเพื่อการประมวลผลภาพและ OpenCV มีความหลากหลายของฟังก์ชันและอัลกอริทึมที่ใช้ในการประมวลผลภาพและวิดีโอ, เช่น การตรวจจับวัตถุ, การระบุใบหน้า, การติดตามวัตถุ, การประมวลผลภาพการยืนยันตัวตน, การประมวลผลวิดีโอ, และมากมายอื่น ๆ

5.3 Face_recognition
face_recognition เป็นไลบรารีโปรแกรมเชิงซอฟต์แวร์ (software library) ที่ถูกพัฒนาขึ้นเพื่อการจดจำและระบุใบหน้าในรูปภาพโดยใช้การเรียนรู้ของเครื่อง (machine learning) ไลบรารีนี้เป็นไลบรารีโอเพนซอร์ส (open source) และถูกพัฒนาโดยชุมชนนักพัฒนาและนักสนับสนุนทั่วโลก

5.3 socket
Socket ใน Python คือไลบรารี (library) ที่ใช้ในการสร้างและจัดการการเชื่อมต่อเครือข่าย และการสื่อสารผ่านเครือข่ายในโปรแกรม Python ได้อย่างมีประสิทธิภาพ ไลบรารี socket ให้ควบคุมการสื่อสารระหว่างคอมพิวเตอร์หรืออุปกรณ์ในเครือข่าย TCP/IP ซึ่งเป็นโปรโตคอลเครือข่ายพื้นฐานที่ใช้ในการส่งข้อมูลผ่านเครือข่ายอินเทอร์เน็ต
5.4 requests
การใช้ไลบรารี requests ใน Python เพื่อส่งข้อความ Line Notify ทำได้โดยทำการทำร้องขอ HTTP POST ไปยัง API ของ Line Notify ด้วยข้อความที่ต้องการส่ง
5.5 <WiFi.h>
ไลบรารีที่ใช้ในการเพิ่มและควบคุมการเชื่อมต่อไร้ ใน ESP32 เป็นตัวควบคุมที่สามารถเชื่อมต่อกับเครือข่าย Wi-Fi และใช้ในการสื่อสารแบบไร้สาย ซึ่งมีความหลากหลายในการใช้งาน เช่น การเชื่อมต่อกับเครือข่ายอินเทอร์เน็ต, การส่งข้อมูลผ่านไร้สาย,การควบคุมอุปกรณ์ไร้สายและอื่น ๆ การให้คอมพิวเตอรเป็น Client และ ESP32 เป็น Host ส่งรับเครือข่ายระหว่างกัน
#include <WiFi.h>
const char* ssid = "*********";
const char* pass = "********";
int port = 6969;
bool isConnected = false;
WiFiServer server(port);
WiFiClient client;
5.6 การแสดงผล
การแสดงผลมี 2 อย่างคือ LED จะบอกสถานะWiFi และ กล้อง มีส่วนสำคัญในการพัฒนาและทดสอบระบบการเชื่อมต่อและการทำงานของกล้องและWiFiในโครงงาน จอภาพผลึกเหลวจะใช้ ไลบรารีที่ใช้ในการควบคุมและแสดงข้อมูลบนจอ LCD (Liquid Crystal Display) ที่เชื่อมต่อผ่านสายสื่อสาร I2C

5.7 Servo motor
คืออุปกรณ์ที่ใช้ในการควบคุมการหมุนหรือการเคลื่อนที่ของอะไรบางอย่างในองค์ประกอบอิเล็กทรอนิกส์ จำลองการประตูหรือเข้าระบบของจริงได้

6.ผลการดำเนินการ

อย่างแรกคือ การเขียนโค้ด Python เขียนการเชื่อมต่อรับข้อมูลภาพจากกล้อง ส่งการแจ้งเตือนไปยัง Line notify และเป็น Client
#ขอบคุณ google และ gpt 3.5 ที่ช่วยผม
import socket
import cv2
import time
import face_recognition
import requests
import os

# Initialize known faces and their encodings
known_face_encodings = []
known_face_names = []

# Load known faces and their encodings from the "known_faces" folder
known_faces_folder = "krit/"

# Loop through the files in the folder
for filename in os.listdir(known_faces_folder):
    if filename.endswith(".jpg"):
        image_path = os.path.join(known_faces_folder, filename)
        image_of_person = face_recognition.load_image_file(image_path)
        face_encoding = face_recognition.face_encodings(image_of_person)[0]
        name = filename.split(".")[0]  # Extract the name from the filename
        known_face_encodings.append(face_encoding)
        known_face_names.append(name)

# Add a new person to the recognition system
new_person_folder = "napat/"

# Loop through the files in the folder
for filename in os.listdir(new_person_folder):
    if filename.endswith(".jpg"):
        image_path = os.path.join(new_person_folder, filename)
        image_of_person = face_recognition.load_image_file(image_path)
        face_encodings = face_recognition.face_encodings(image_of_person)

        if len(face_encodings) > 0:
            # Take the first face encoding (assuming there's only one face in each photo)
            face_encoding = face_encodings[0]

            # Extract the name from the filename (you can name the files as the person's name)
            #name = filename.split(".")[0]

            known_face_encodings.append(face_encoding)
            known_face_names.append("napat")

# Rest of your code remains the same


# Replace with your ESP32's IP address and port
esp32_ip = "xxx.xxx.xxx.xxx"
esp32_port = 6969

s = socket.socket(socket.AF_INET, socket.SOCK_STREAM)
s.connect((esp32_ip, esp32_port))
print(f"Connected to ESP32 at {esp32_ip}:{esp32_port}")

cap = cv2.VideoCapture(0)
face_cascade = cv2.CascadeClassifier(cv2.data.haarcascades + 'haarcascade_frontalface_default.xml')

# Line Notify Token - Replace with your actual Line Notify token
line_notify_token = 'kpYRmm3K3qrpd7hkbn7WPtj0Ac5PbgXURP3DTAlplmX'

def send_line_notification(message, image_path=None):
    url = 'https://notify-api.line.me/api/notify'
    headers = {
        'Authorization': f'Bearer {line_notify_token}'
    }
    data = {
        'message': message
    }

    files = None
    if image_path:
        files = {'imageFile': open(image_path, 'rb')}

    response = requests.post(url, headers=headers, data=data, files=files)

    if response.status_code == 200:
        print('Line notification sent successfully')
    else:
        print('Failed to send Line notification')

try:
    matches = []  # Initialize 'matches' outside the loop
    while True:
        ret, frame = cap.read()
        if not ret:
            print("Failed to capture a frame.")
            break

        gray = cv2.cvtColor(frame, cv2.COLOR_BGR2GRAY)
        faces = face_cascade.detectMultiScale(gray, scaleFactor=1.3, minNeighbors=5, minSize=(30, 30))

        matches = []  # Reset 'matches' for each frame

        for (x, y, w, h) in faces:
            cv2.rectangle(frame, (x, y), (x + w, y + h), (0, 255, 0), 2)

        face_locations = face_recognition.face_locations(frame)
        face_encodings = face_recognition.face_encodings(frame, face_locations)

        for (x, y, w, h) in faces:
            if face_encodings:
                matches = face_recognition.compare_faces(known_face_encodings, face_encodings[0])
                name = "Unknown"

                if True in matches:
                    first_match_index = matches.index(True)
                    name = known_face_names[first_match_index]

                # Draw the name of the recognized face
                cv2.rectangle(frame, (x, y - 20), (x + w, y), (0, 255, 0), cv2.FILLED)
                font = cv2.FONT_HERSHEY_DUPLEX
                cv2.putText(frame, name, (x + 6, y - 6), font, 0.5, (0, 0, 0), 1)

        cv2.imshow("Face Recognition", frame)

        if True in matches:
            message = "on"
            # Capture a photo and save it
            photo_filename = 'captured_photo.jpg'
            cv2.imwrite(photo_filename, frame)
            # Send Line notification with the photo
            send_line_notification(f'มีคนเข้าระบบ ใบหน้าคือ: {name}', image_path=photo_filename)
        else:
            message = "off"

        s.send(message.encode('utf-8'))

        if cv2.waitKey(1) & 0xFF == ord('q'):
            break

        time.sleep(1)  # Add a 1-second delay

    cv2.destroyAllWindows()
    cap.release()
except Exception as e:
    print(f"Error: {e}")
finally:
    s.close()
อย่างต่อมา Ardunio ESP32
#include <WiFi.h>
#include <LiquidCrystal_I2C.h>
#include <ESP32Servo.h>

#define I2C_ADDR 0x27
#define LCD_COLUMNS 16
#define LCD_ROWS 2

LiquidCrystal_I2C lcd(I2C_ADDR, LCD_COLUMNS, LCD_ROWS);

Servo myservo;

#define LED_ONE 12
#define LED_TWO 14

const char* ssid = "kranax1150";
const char* pass = "123456789";
int port = 6969;
bool isConnected = false;

WiFiServer server(port);
WiFiClient client;

bool servoIsOpen = false;

void setup() {
  Serial.begin(115200);
  WiFi.begin(ssid, pass);

  pinMode(LED_ONE, OUTPUT);
  pinMode(LED_TWO, OUTPUT);

  lcd.init();
  lcd.backlight();

  myservo.attach(4);

  while (WiFi.status() != WL_CONNECTED) {
    Serial.println("Connecting...");
    digitalWrite(LED_ONE, HIGH);
    lcd.clear();
    lcd.setCursor(0, 0);
    lcd.print("Connecting...");
    delay(1200);
    digitalWrite(LED_ONE, LOW);
    lcd.clear();
    lcd.setCursor(0, 1);
    lcd.print("Connecting...");
    delay(1200);
  }

  isConnected = true;
  digitalWrite(LED_TWO, HIGH);
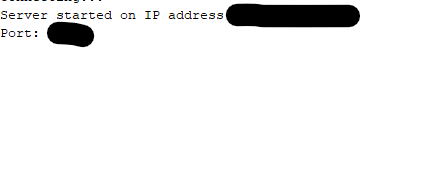
  Serial.print("Server started on IP address: ");
  Serial.println(WiFi.localIP());
  lcd.clear();
  lcd.setCursor(0, 0);
  lcd.print("Welcome to COE");
  Serial.print("Port: ");
  Serial.println(port);
  myservo.write(0); // Initialize servo to 0 degrees

  server.begin();
}

void loop() {
  if (WiFi.status() != WL_CONNECTED && isConnected) {
    // WiFi reconnection handling
    Serial.println("WiFi disconnected!");
    isConnected = false;
    digitalWrite(LED_TWO, LOW);

    while (WiFi.status() != WL_CONNECTED) {
      Serial.println("Reconnecting..");
      digitalWrite(LED_ONE, HIGH);
      lcd.clear();
      lcd.setCursor(0, 0);
      lcd.print("Reconnecting...");
      delay(500);
      digitalWrite(LED_ONE, LOW);
      lcd.clear();
      lcd.setCursor(0, 1);
      lcd.print("Reconnecting...");
      delay(500);
    }

    isConnected = true;
    Serial.print("Reconnected to WiFi. IP address: ");
    digitalWrite(LED_TWO, HIGH);
    Serial.println(WiFi.localIP());
    lcd.clear();
    lcd.setCursor(0, 0);
    lcd.print("Welcome to COE");
  }

  if (client) {
    if (!client.connected()) {
      // Client disconnection handling
      digitalWrite(LED_ONE, LOW);
      lcd.setCursor(0, 1);
      lcd.print("Client fail");
      client.stop(); // Close the disconnected client
      Serial.println("Client disconnected, LED_ONE turned off");

      // Add code to make LED_TWO blink for 0.5 seconds
      digitalWrite(LED_TWO, HIGH);
      delay(500);
      digitalWrite(LED_TWO, LOW);
      Serial.println("LED_TWO blinked for 0.5 seconds");
    } else {
      while (client.available()) {
        String message = client.readStringUntil('\n');
        Serial.print("Received: ");
        Serial.println(message);

        if (message.equals("on")) {
          digitalWrite(LED_ONE, HIGH);
          Serial.println("LED_ONE turned on");

          if (!servoIsOpen) {
            myservo.write(90); // Rotate servo to 90 degrees (open)
            delay(1000); // Wait for 1 second to see the servo position
            servoIsOpen = true;
          }

          lcd.clear();
          lcd.setCursor(0, 1);
          lcd.print("Welcome User");

          for (int i = 0; i <= 4; i++) {
            lcd.setCursor(0, 0);
            lcd.print("Countdown: " + String(i));
            delay(1000);
          }

          lcd.clear();
          lcd.setCursor(0, 0);
          lcd.print("Welcome to COE");
          digitalWrite(LED_ONE, LOW);
          Serial.println("LED_ONE turned off");

          if (servoIsOpen) {
            myservo.write(0); // Rotate servo to 0 degrees (close)
            delay(1000); // Wait for 1 second to see the servo position
            servoIsOpen = false;
          }
        } else if (message.equals("off")) {
          digitalWrite(LED_ONE, LOW);
          Serial.println("LED_ONE turned off");
          lcd.clear();
          lcd.setCursor(0, 0);
          lcd.print("Welcome to COE");
        }
      }
    }
  }

  if (!client) {
    client = server.available();
  }
}
การทดลอง
6.1ทดลองความแม่นยำในการระบุใบหน้า
การควบคุมแม่นยำในการระบุใบหน้าเป็นสิ่งสำคัญในระบบสแกนใบหน้า เพราะมันมีผลต่อความปลอดภัยและประสิทธิภาพของระบบนี้ โดยจะทดลอง 20 ครั้งต่อเนื่อง


6.2. TCP / IP
TCP/IP (Transmission Control Protocol/Internet Protocol) เป็นชุดข้อกำหนด (protocol suite) ที่ใช้ในการสื่อสารข้อมูลระหว่างคอมพิวเตอร์บนเครือข่ายอินเทอร์เน็ตและเครือข่ายคอมพิวเตอร์อื่น ๆ โดย TCP/IP การที่ไม่ต้อง mqtt ทำให้ได้พบมีวิธีอื่นสื่อสารระหว่างอุปกรณ์ตัวอย่างการเชื่อมอยู่


6.3 การแจ้งเตือน Line notify API ฟรีจาก Line ทำเราสามารถทำระบบแจ้งเตือนได้สบาย

สรุปผลและข้อเสนอแนะ
โมเดลใหม่มีความแม่นยำปานกลางถึงค่อยข้างสูง 50-70% แต่แลกกับความต้องการของประสิทธิภาพคอมพิวเตอร์ที่สูง การเชื่อมต่อที่ไม่ค่อยเสถียร ESP32 มีวิธีคือต้องมีwifi ที่ความเร็วแรงสูง กล้องที่ Delay เพื่อรอEsp32 ประมวลผลทัน Python ส่วน Line notify ทำงานได้ดีที่สุด ไม่มีการผิดพลาด
โมเดลเก่ามีความแม่นต่ำ 25-50% ทำให้ความต้องคอมพิวเตอร์ไม่สูง สาเหตุฐานข้อมูลที่น้อยทำให้มีความสูงประมวลผลสูง และ Line notify ทำงานได้ดีที่สุด เหมือนเดิม
เอกสารอ้างอิง
Chat Gpt 3.5 เว็บไซต์แชทบอทจาก OpenAI [สืบค้นวันที่ 1 พฤษจิกายน 2566] https://chat.openai.com
An approach for Face Detection and Face Recognition using OpenCV and Face Recognition Libraries in Python
Ainampudi Kumari Sirivarshitha; Kadavakollu Sravani; Kothamasu Santhi Priya; Vasantha Bhavani[สืบค้นวันที่ 25 ตุลาคม 2566] https://ieeexplore.ieee.org/document/10113066
OpenCV & Python | Computer Vision สำหรับผู้เริ่มต้น [FULL COURSE] [สืบค้นวันที่ 20 ตุลาคม 2566] https://www.youtube.com/watch?v=fLDJJXEykvo
face-recognition 1.3.0 License: MIT License (MIT license )Author Adam Geitgey] [สืบค้นวันที่ 20 ตุลาคม 2566] https://pypi.org/project/face-recognition/


